Showing posts with label doll making pattern. Show all posts

Wednesday, December 22, 2010

De-Stressing The Holiday Tension With A Free Cloth Doll Pattern

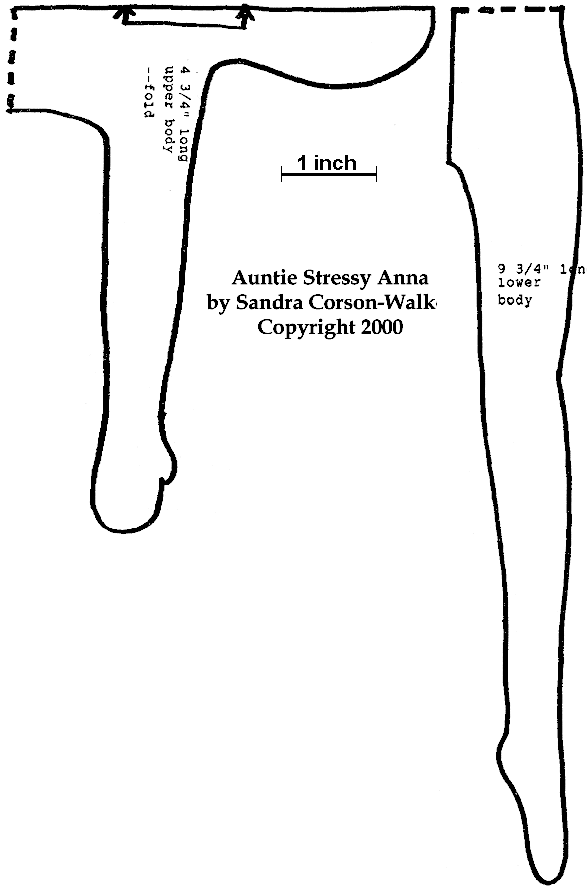
Today's free cloth doll pattern comes from my much needed day of relaxing :) With all the errand running, baking, keeping the ids busy that are home from school, sometimes moms (and grandma's) just need a few minutes to themselves.

The free cloth doll pattern that I'm giving you today gives you just that... it's a rice filled doll that you can warm up in the microwave. Because it's filled with rice, it holds the heat longer and you can relax in your favorite chair with a warm cup of coffee and this new doll to relax those tense muscles.


Here's what you'll need to make this free cloth doll pattern:
  • 1/2 yard sweatshirt fleece, flannel, polar fleece or any soft moldable fabric (make sure fabrics DO NOT have metallic paint or threads woven into the design)
  • 2 pounds of rice, whole wheat, buckwheat hulls, or dried beans (Do NOT use popcorn)
  • Small amount of polyester fiberfill
  • Funnel 
  • Thread to match fabric 
  • Freezer paper
  • Free Cloth Doll Pattern
Here are the steps to take to make your free cloth doll pattern:
  1. Trace the free cloth doll pattern onto your material and cut out. 
  2. Lay your material so that the right sides are facing each other. Stitch around the edge of your material (so that it's inside out)- be sure to leave an opening under one arm so you can turn the fabric and stuff it after stitching.
  3. Once you're finished sewing, turn the doll inside right. Stuff the head, legs, and arms with polyfil stuffing. 
  4. Now use the funnel to fill the rest of the body with rice. NOTE: you could fil with beans, but I've found rice holds the heat longer. When you fill the doll leave some room for the rice to move around in the body - you want this to be flexible enough to wrap around your neck or lower back etc. 
  5. Finally stitch the opening closed. Be sure to do a good job here - you don't want any rice escaping when you start to use this doll.
When you're ready for some "me time" head the doll in the microwave for 1-2 minutes. Then sit and relax.

A warning from the free cloth doll pattern creator -
WARNING! Do not use a fabric with metallic threads of any kind or sew with metallic threads as your doll will catch fire when heating in the microwave. We recommend you use a patterned fabric for this project, eliminating the need to paint a face or add hair or clothing, as some paint and yarn will not be safe in the microwave.

Special thanks to Sandra Corson-Walker for sharing her free cloth doll pattern with us.

Monday, December 20, 2010

More Holiday Spirit - Free Cloth Doll Pattern

Today I decided to do a special Holiday Edition of free cloth doll patterns. On Friday all of our family will get together for a holiday party where we decorate cookies, do crafts with the kids, sing Christmas carols, and eat way too much.


This year I thought it would be awesome to give the kids a gingerbread man that they can decorate with paint and felt pieces. So I found this great free cloth doll pattern for a simple gingerbread man.

White searching for gingerbread men patterns, I cam across a picture of a family of gingerbread garland that I just loved. So, I also used the free cloth doll pattern to make Gingerbreadman Family ornaments (see picture below). It was a super simple process.

Here's what you'll need for this holiday doll making pattern:

Materials:
  • Brown Felt (enough for the family of dolls - remember each gingerbread person has 2 sides) I used Felt Squares picked up from a local craft store for .25 per sheet. I fit a big gingerbreadman and a little gingerbread man on each sheet. Then unfolded the scrap and cut out another small gingerbread (so 3 per sheet). This seemed cheeper and easier than buying a bulk sheet of felt.
  • Multicolor Felt (for clothing and accessories)
  • Fabric Paint
  • Polyfil Sutffing
  • Thread (to match brown felt and mutilcolor choices)
  • Fabric Glue (for tacking on clothing before sewing)

Steps for completing your Holiday Doll Making Pattern
  1. Trace the free doll pattern onto the brown felt Then cut out. Remember 2 pieces of felt for each doll you make.
  2. Now, sew the two pieces of felt together leaving a gap for stuffing across the head. You could use brown thread for this step. However, I chose to go with White since gingerbread cookies normally have a white decor edge on them. It gave it a great contrasting pop.
  3. Next you need to stuff your gingerbread family using the poly/fil stuffing. I didn't stuff too much as they were meant to be wall decorations during christmas - just enough to give them some fluff. Once it's stuffed to your liking sew up the open gap.
     
  4. Decorate each gingerbread man/woman to your liking. I just cut out felt pieces for dresses, ties, hats, hair bows, etc. I've added some of my designed below. I tacked the clothes on with glue first, then sewed around the edges with matching thread to ensure the gingerbread family will hold up over time.
     
  5. Sew the gingerbread family together. I just looped some thread through the hand edges to that they'd meet. however, I found a few paper garland gingerbread pictures online that attached the hands to hearts. I may try this on my next batch for another family member - I'll update with pictures if I do.

    Note: In my first go at this doll making pattern, I didn't create a way for the family to hang their garland of gingerbread. So, I'd add a ribbon loop to the back of the two end dolls for future projects...

EDITED: to add details of how we used the free cloth doll pattern to make the ornaments with kids

Gingerbread Christmas Ornaments
To make individual gingerbread ornaments using the free cloth doll pattern with kids I pre-sewed the gingerbread men before the get together. Then let the kids stuff their gingerbread men, and sew the last little gap shut (with a parents help).

I also pre-cut a bunch of clothing and accessories from felt scraps I had from past projects. The kids glued on the pieces using Elmers glue to make their individual ornament. Be sure not to put on too much glue or the cloth wont stick to each other.

Finally, I wrote each kids name on their doll using some fabric paint. We let them set out to dry over night and the next morning had beautiful new ornaments for the tree.

To get the ornament to hang - I just sewed on a loop of ribbon at the top of the head after the doll was complete, but if you wanted you could attach this inside the doll before clothing it shut when stuffing.

Hope you get to enjoy at least one of these awesome doll making projects. When you do, come back and post some comments of how well the projects went or send in pictures!

Wednesday, December 8, 2010

Enjoying The Christmas Spirit - Free Cloth Doll Pattern

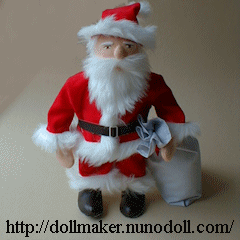
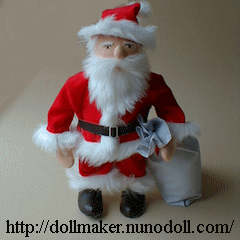
If you're anything like the other crafters of the world you absolutely LOVE decorating for the holidays. This Christmas season, I really wanted to put my very own Santa doll up in the house - one that I had made and not purchased from the store.

So, I began searching the internet for different Santa Doll Patterns. I even went to the local bookstore to see if they had any holiday dollmaking books (no such luck). The good news is that after some searching, I came across a free doll pattern online for an excellent santa doll.


I chose this free cloth doll pattern because it added a few more skills that I haven't tried yet. The first are the detached arms. All of the previous cloth doll patterns that I've tried had attached legs and arms to the body before stuffing. This cloth doll pattern requires them to be separate and attached after stuffed. Sounds a little tricky, but the detail it gives should be worth it.

I've also never stuffed the doll with a stick at the neck to give it more strength. All of my past dolls have been for kids so I wanted them to be flimsy bodies (but durable of course). This doll will most likely be shelved near the mantle or stand by the christmas tree so he needs the extra body support.

This free cloth doll pattern also forces me to use new types of material - the fuzzy thread for the hair, and the fuzzy material for Santa's clothes. I'm a little worried about how easily they'll sew together, but with the awesome directions that the pattern and instruction gives I'm sure it'll come together nicely. So, let's get started:


Here are the materials you'll need for this free santa doll pattern:

  • Felt (skin colored)
  • Cotton batting (neck)
  • Stick (neck core)
  • Furry yarn (hair and brows)
  • Artificial leather (boots and belt)
  • Red Woolen or cotton cloth (clothes)
  • Furry cloth (beard and rimming)
  • Thick paper (for shoe sole)
  • Snap fasteners
  • Elastic
Other materials you probably already have:
  • Sewing kit (sewing machine, needles, scissors, etc)
  • Polyester fiberfill
  • Threads to match your materials - White, Skin Tone, Red, Black)
  • Craft glue
  • A stick to stuff
  • Blush for cheeks
  • Paints for the face - Black, Brown & white
The best part of this free doll pattern for Santa is the step by step picture instructions. You can find the complete instructions for this free cloth doll pattern here:
Picture Instructions For Body
Picture Instructions for Clothes

Here are just a few steps that I pulled from the instructions:

Constructing the head and adding a nose. I haven't added facial features like this before.. only ever painted them on - so I'm looking forward to trying this out.

Building the body strong enough to stand on it's own.


Making boots for the legs that will be strong enough to support the rest of the body makes me a little nervous, but with the instructions and pictures - looks pretty simple.

Here are the free cloth doll patterns you'll need to download and print:
Head, Arms, & Legs
Jacket & Pants
Cap & Body

It may be easier to just download an entire PDF of the free cloth doll pattern for Santa - You can do that here: Free Santa Doll Pattern

Special Thanks to Runo the dollmaker for being so creative and sharing your free cloth doll patterns with us.

Enjoy this free doll pattern and don't forget to send in your pics!